
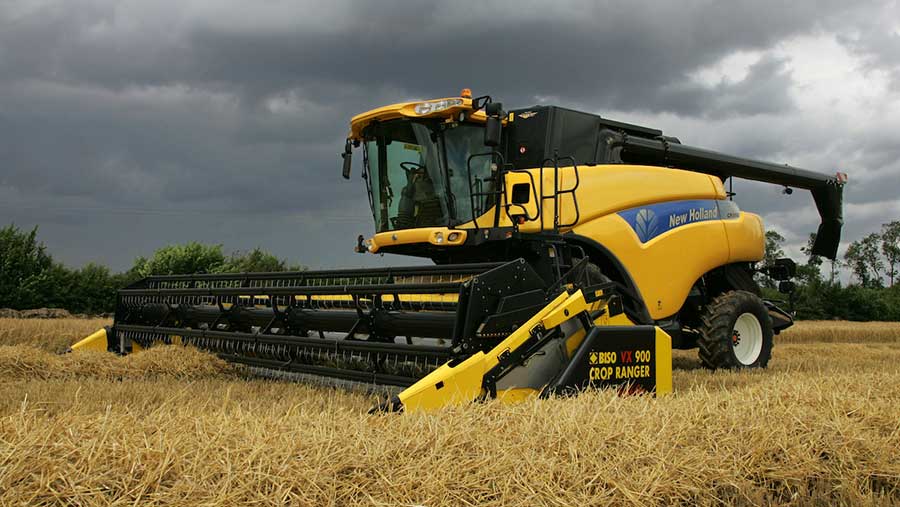
Top tips to keep your combine running in the wet
 © Tim Scrivener
 August invariably delivers a spell of bad weather, so we’ve put together 20 top tips from the experts on how to ease the flow of damp crops through the combine.
See also: Agronomist-built combine attachment helps monitor losses
Header
1. Lift skid-plates as high as they’ll go to avoid bull-dozing. As a guide, New Holland recommends the cutter-bar should be 50mm (2in) off the deck with the header set down on level concrete.
2. Fingers should have square edges to ensure a clean shear, and knife-keepers should be wound down tight against their springs. Alternatively, shims can be fitted to ensure a smooth, scissor-like action.
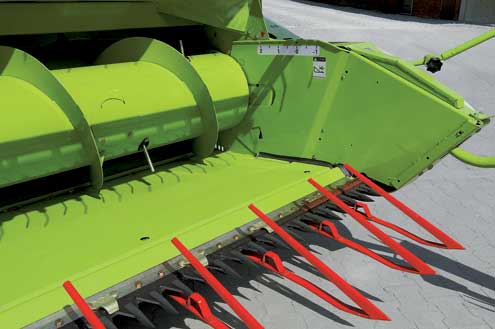
3. Don’t fit too many crop lifters – they’ll pull up the root and make a mess when wet. Make sure any you do fit are clean and rust-free to improve crop flow.
4. On headers where it is possible to adjust the knife-to-auger distance (for example Claas Vario and NH VaryFeed), set them so that the plants feed in ear-/pod-first.
If it is set too short, the crop will tend to ball up. If the gap is too big then you’ll end up using the reel to propel material towards the auger.
The cutterbar will be too far from the front wheels to get an even cut, too, particularly on wide headers.
5. There’s licence to use the reel more regularly because damper crops shouldn’t be so keen to shed grain.
Use it to make sure the feed is even and that crops go head-first up the feed elevator. Adjust tine angle so that their main section remains vertical while their cranked tip points in towards the table.
6. Set the table-to-auger clearance. The scraper plates in the bottom of the trough should have a gap of about 5mm while there should just be a slice of daylight (about 3mm) between the flights and those at the back.
Do this with the header up in the air as the auger’s weight shifts when it’s set down on the deck.
Some augers have bolt-on flight extensions at the centre to help propel difficult, damp material to the middle of the machine. Make sure these are fitted but when it eventually comes in dry whip them off again.
Otherwise you’ll end up with a big heap of crop running right through the centre-line of the threshing gear, which won’t make the most of the full separation area.
7. Damp crops will put heavy loading on the entire driveline but particularly the auger slip-clutches. Pinch them up tight so they don’t over-run at the sight of a single ear of wheat.
Letting them keep slipping will shorten their life.
As a rule of thumb, the friction plates will last just ten adjustments – in a tricky season it won’t be long before they need replacing. However, be aware that there’s greater potential to stuff the drum up.
8. Slowing the auger speed will limit the risk of damp crops wrapping. Switching the chain-drive sprockets should drop things by 100rpm.
9. Setting the retractable auger fingers to a more shallow angle will also limit the amount of wrapping. Aim for 10mm between the tip of the fingers and the trough floor.
10. Consider lifting the cutterbar height if you’re not planning on baling the straw. This will help smooth crop flow and reduce the power requirement on the chopper.
However, forward speed needs to be upped accordingly to keep the harvester as full and working at its optimum.
For laid crops, keep forward speed sensible as the operator will have to leave shorter stubbles and the combine will need to process more straw.
Threshing
1. On combines with a pre-separation drum ahead of the main concave, drop the stone-strap hatch and feel to see that dirt hasn’t blocked the pre-sep. concave.
2. Adding 60rpm/year to drum speed should account for wear, particularly important in crops where grain may be reluctant to leave the ear. Remember, drum speed and concave settings in the book are for a brand new machine.
3. When conditions are really rough the grain pan trays will fill with dirt and debris at a rapid rate. Each evening it’s worth slipping the trays out through the front of the machine and giving them a good blast with the pressure washer.
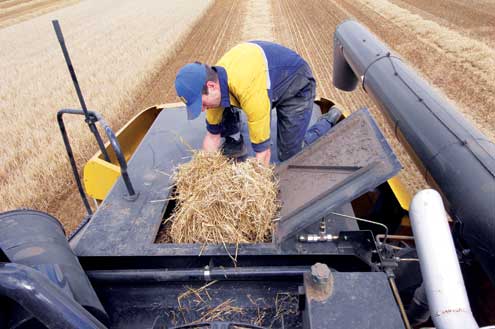
4. Dirt is an issue with the unloading auger too. Muck can build up in the sleeve, steadily restricting grain flow like a cholesterol-constricted artery.
The first sign of this will be output dropping off to a trickle and shear-bolts snapping.
There are two ways to deal with this. The first involves blocking the auger at the turret end with a bundle of rags and then flooding the sleeve with a hose to soften and loosen the encrusted crud. When you next fire it up it should then clear itself.
When that doesn’t work, growers in Scotland who encounter the problem on a regular basis are known to whip the entire spout off and drop it in a ditch or reservoir overnight.
If you can stomach slower unloading then shut down the grain tank outlet slides to reduce the risk of overloading the auger.
5. To increase the action of the straw walkers, bolt-on step extensions (sometimes called risers or fish-tails) are available. These lift the crop higher and drop it further, increasing the aggressiveness of separation.
6. Combines with a straw beater over the walkers might have a tendency to bung up more easily. While it’s difficult to avoid damp material wrapping around the rotor, some operators remove it completely when things get tricky.
7. On rotaries, extra pegs can be bolted on to both threshing and separation sections. These help to avoid the crop stalling and keep things moving around the rotor.
8. Up in the straw hood, check that the blockage sensor is working before you set off into the first field. Nudge the switch flap with a broom and listen for the buzzer to sound. It’s an essential early warning system, especially as most snarl-ups start from the rear.
9. Chopper blades need to be sufficiently sharp and sat at the correct angle if they’re dealing with damp straw. Keep an eye on your mirrors for lumpy chaff – it’s a sign that the feed isn’t even enough.
10. Don’t set the swath guides too narrow. Most modern balers need a decent width to form an even bale and you’ll avoid an unnecessary bottleneck by setting them to drop a wide row.
Have you got any extra tips or modifications that make running a combine in the wet a less stressful experience? Email them to [email protected]